.png)
Preparation Tips for Your First Wood-Burner
- Southwest Woodburners

- Aug 25, 2025
- 4 min read
Updated: Jan 24
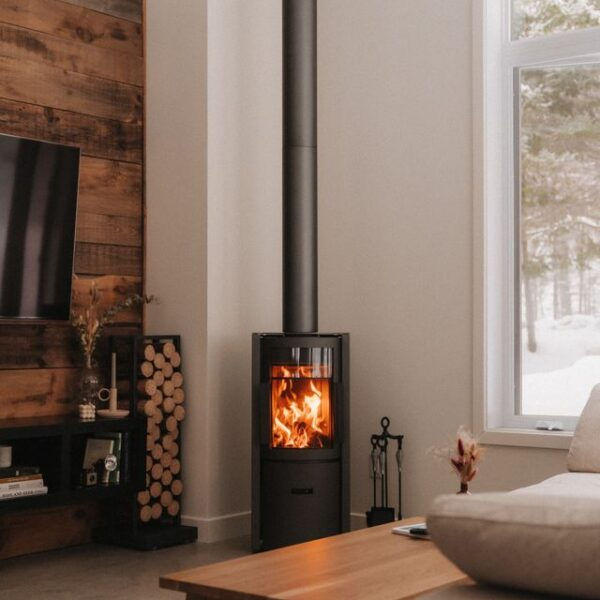
Your Friendly Checklist for a Smooth, Stress-Free Installation of Your Wood-Burning Stove
There’s something undeniably magical about installing your very first wood-burning stove. The promise of cosy evenings, the warm glow of the flames, and the satisfaction of choosing a sustainable heating solution—it’s a big moment for any homeowner. But before you can sink into that sofa with a mug of tea and enjoy your first fire, there are a few important steps to get right. Preparing properly will not only make your installation smoother but will also ensure you get the very best performance from your stove.

At Southwest Woodburners, we’ve guided hundreds of homeowners through their first installation. Here’s our friendly checklist to help you get started.
1. Choose the Perfect Spot
Before we even light the first match, you’ll need to decide where your stove will live. The location affects everything—from the type of stove you need to the way your flue is fitted.
Make sure the area has sufficient clearance for safe installation.
Consider how the stove will work with your room’s layout and natural airflow.
Think about future-proofing—choosing a spot where you can comfortably store logs or add accessories later.
We’ll always carry out a full site survey to ensure your chosen space is suitable. However, having a vision in mind is the perfect starting point.
2. Plan Your Wood Storage
A wood-burning stove is more than just a heating appliance—it’s a lifestyle. One key part of that lifestyle? Storing your firewood. Where you store your logs matters just as much as the type of wood you burn.
Outdoor Storage
Your logs need to stay dry, ventilated, and easily accessible, especially during the colder months. A stylish outdoor storage solution doesn’t just protect your wood; it also enhances your garden or patio.
Hwam Multiflex Wood Storage – A sleek, versatile solution perfect for gardens of any size.
Rais Woodrack – Minimalist Scandinavian design meets practical log stacking.
Both options allow airflow around your logs, preventing damp and ensuring your wood is always ready for burning.
Indoor Storage
Once you’ve brought the logs inside, you’ll want somewhere equally practical—but beautiful—to store them.
Hwam Firewood Bucket – A modern, compact way to keep your logs within easy reach.
Rais Woodwall – A statement piece as much as it is storage, turning your log pile into an interior feature.
Bodj Basketware & Ironware – Handcrafted baskets and elegant iron solutions that bring character to any room.
Your stove deserves more than a plastic crate in the corner. These storage options turn practicality into part of your home’s design.
3. Choose the Right Fuel
Not all firewood is created equal. To get the most out of your stove, opt for seasoned or kiln-dried logs. These burn cleaner, produce less smoke, and maximise heat output. Quick tip: Aim for logs with a moisture content below 20%. We’re happy to guide you on sourcing quality fuel if you’re unsure where to start.
4. Get Your Space Ready
Before installation day, it’s worth preparing your home:
Clear the area where your stove will sit.
Protect nearby flooring if necessary.
Make sure there’s easy access for our installation team to bring in the stove and equipment.
We’ll handle the rest, but a little preparation goes a long way.
5. Book Early to Avoid Delays
Autumn always creeps up faster than you think. As the cooler months approach, demand for stove installations skyrockets. To guarantee your slot—and avoid last-minute stress—we recommend booking early. Whether you’re upgrading an old appliance or installing your first stove, securing your installation date now means you’ll be ready to enjoy your first fire just as the chill sets in.
6. Understand the Installation Process
Knowing what to expect during the installation can ease your mind. Here’s a brief overview of the process:
Site Survey: Our team will assess your home and discuss your preferences.
Preparation: We’ll prepare the area, ensuring everything is ready for the stove.
Installation: The stove will be installed according to safety regulations.
Testing: We’ll test the stove to ensure it’s functioning correctly.
Final Touches: We’ll clean up and provide you with instructions on how to use your new stove.
7. Enjoying Your New Stove
Once your stove is installed, it’s time to enjoy it! Here are some tips for making the most of your new wood-burning stove:
Start with Kindling: Use small pieces of wood and kindling to get your fire going.
Maintain Airflow: Ensure proper airflow for a clean burn.
Regular Cleaning: Keep your stove and chimney clean to maintain efficiency and safety.
Ready to Begin Your Wood-Burning Journey?
At Southwest Woodburners, we’re here to make the process seamless, stress-free, and exciting. From helping you choose the perfect stove to recommending stunning accessories and storage solutions, we’re with you every step of the way.
📍 Visit our showroom in Dorchester
📞 Call us on 01305 542091
📧 Email us at info@southwestwoodburners.co.uk
Or explore our full range of stoves and accessories here: www.southwestwoodburners.co.uk


.png)
Comments